BalanceRun 2.0 Character Animation Tool
BalanceRun 2.0 is a Keyframe-Generator for Walkanimations.
It comes as an add-on for Blender and is capable to animate characters from 2 up to 8 feet with a few clicks. Unlike any other software available, BalanceRun animates the character to follow a targetobject in any given direction, setting the footsteps to balance its own pivot.
So your character will automatically walk forward, backwards, sidewards and turn around, to mimic the targetobjects movement. Furthermore there is a basic dynamical spring-system that adds bouncing motion to the walk. Animateable parameters for the legs and feet help to adjust the walk to the desired result.

While BalanceRun2.0 is available on Click2Sell for €20.-
Check out the full documentation here.
Features:
- From 2 to 8 feet simulated. Perfect for arbitrary creature animation.
- Hip, Chest and Property slots to add bouncing elements to the motion.
- Animateable parameters to define and alter the behaviour of your character over time.
- Easy groundheight control over the targets z-position.
If the target-object is risen on the z axis, the character will follow upwards like stepping up a hill or steps. - Furthermore there is a basic dynamical spring-system that adds bouncing motion to the walk.
- Footangles during the step can be defined, to give the foot the right look, as it is lifted.
- Particlesystems can be generated (once per foot), to emit dust and stones at each step.
- Once your animation is generated you can reduce keyframes, for easier refinement of your animation.
Get started:
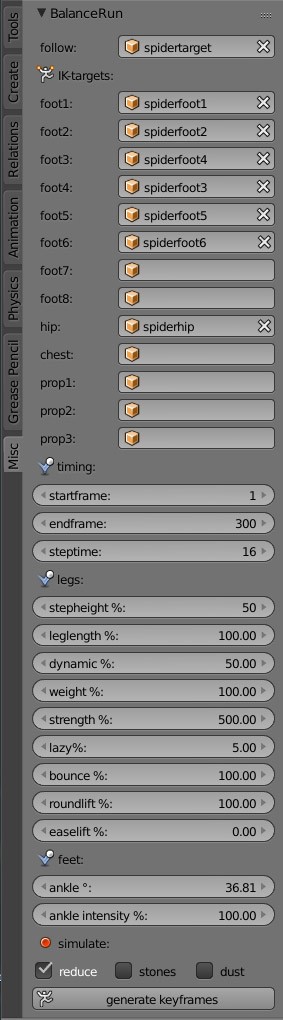
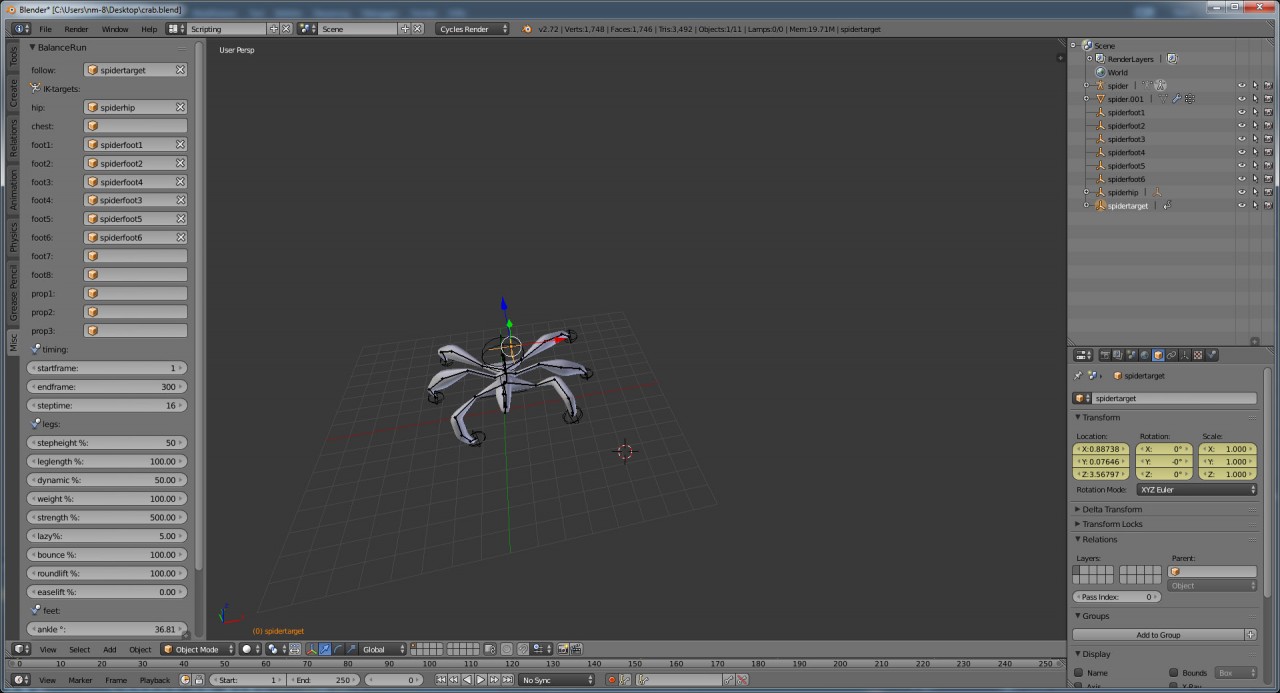
Before animating your charactes walk, BalanceRun needs some Information. Your Characters Feet should be driven by IK-goals or have any other objects, that define where your feet are at any given time.
These objects will be animated by BalanceRun. They are called "feet" in the selection section.
Selection
Start by choosing the object that the Character should follow in the first
selectionfield called "follow". This Object should either have keyframes or any constraint that changes its location and z-rotation over time.
This object therefore defines the seeked position and viewing direction of your character. It should be located where the characters hip is, and only move up and down the z-axis to alter the height of the ground (for example walking up a hill or stepping steps). Mainly it shouldn't change height, because all leg dynamics depend on the z-position of this target object.
Then you choose the "feet". These are the ankles of the legs. Usually IK-goals, but any given geometry that has a location and rotation can be used here. 2 feet are required at least. And up to 8 feet are suppported.
Note that also odd feet like 3-legged robots and 5 legged monsters are possible with the very same algorithm!
That's it, you could start the keyframe generation right away.
You can choose a "hip" (optional!), if the character isn't directly linked to the follow object (for example with a location constraint on the root bone to the follow object), but rather follows it smoothly while the follow-object only has a few linear interpolated keyframes. This enables you to handle the movement with a few keyframes, while motion still will look vivid and natural, even comic-stylized in some situations. Think of using the hip selection as your charcter is dragged by the "follow-target"-object.
So you have to care less about smooth motion and too many keyframes.
Furthermore you can choose a chest (optional!) that shall balance right above the hip (if one is chosen) or the follow target (if no hip is chosen).
As well as props (property objects) for any swinging parts of your character (arms, head, tails)
Parameters
To design your walk, you can define various properties of motion. BalanceRun 2.0 has a built-in spring system for the hip and some interpolations, that can be altered using parameters.
Note that these parameters are animateable! This gives you a lot more freedom to design the animation. Though its recommended to first choose a good set of values before you animate them.
timing:
startframe and endframe are defining the period of frames which shall be gerated keyframes for. its good to have some buffer before and after your character walks. These two values arent animateable.
steptime:
Yes this is animateable :) This value has the biggest impact on how your walk will look like. Smaller values will result in hectic but quickly reacting movement. Bigger values will make slower movement, but may result in steps, that are too long for the leg to reach. The character might look floating then. It's crucial that this is the first parameter you adjust.
Legs Parameters
Here you design how the legs shall move once they're lift up.
Again its crucial to know that most of the movement will be defined by the startingpose of the character at startframe. All distances between followtarget, hip, and feet will be measured and many relations and characteristics are setup just by the pose itself. So before you adjust these values, try to adjust the startpose and see how the generated walk will alter.
Stepheight defines how high the foot gets during a step, compared to the height of the leg.
Leglength: if the leglength is much higher than the direct distance between hip and foot at startframe, this value may be increased, to allow the foot to reach farther. This value can't get lower than 100% meaning: at startframe the feet must touch the ground.
Dynamic: The dynamic value can blend between a static and a wiggling motion. A heavy and slow robot would use 0% dynamic, and a comic-character would use 100% dynamic. Values between 0 and 100% are blending fine. Though you can set themfrom -100% to 200% as well, these exaggerated values should be used with caution for experimental solutions.
Weight and Strength define how the charcter pushes itself up from the ground, and wiggles while legs are lift and set down. You'll see that, if only one foot is on the ground, the hip gets lower. If many are touching down, the hip gets pushed up.
Lazy eases the speed to move the foot. Higher values will lead to slow starting but very quick ending of the step. It also influences many other movements in the same manner.
Bounce is the direct blending value for the hip to wiggle and bounce.
If set to 0% it wont bounce at all (for example a heavy slow robot)
Roundlift will get the feet up following along a circle (100%) rather than along a pyramid (0%).
Easelift defines how quick the foot is lift up and set down.
Feet Parameters
During a step the foot is usually rotated around its ankle, to lift up with its tip still touching the ground, and set down with the tip still up. This natural behaviour is implemented as two sine-curves in BalanceRun 2.0 . One doing a whole cycle for the tip to be down and up. And one sine-curve doing half a cycle to add the angle-tendency.
Ankle° defines the angle, that the foot shall tend to. (For a Horse its mainly backwards, that'd be 90° for a human it would be 0° heading the sole mainly down. -90° would rotate the sole forward, while lift up)
Ankle intensity is the amplitude of the sinecurves. Lower values will reduce the rotation.
Simulate
Finally all values are set, and you are ready to let your character walk.
Choose to reduce keyframes after they are generated. This will delete unnecessary keyframes, hence reduce their amount for easier manual refinement, though round trajectories of a step will be reduced to 3 linear segments.
Check stones or dust to generate particle systems on the foot objects, that emit stones at lift, and dust at lift and at set down.
Its recommended to generate particles only when you are happy with the walkaniamtion itself.
Last but not least hit generate keyframes, to do exactly that. :)
That's it! I hope you enjoy your walkanimations more with BalanceRun. Have fun animating!
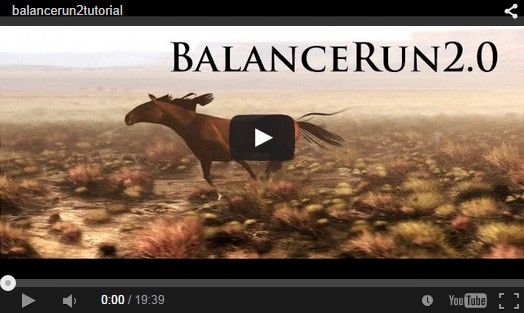
product walkthrough:
Copyright by Richard Nagy 2015. Click2Sell is an authorized reseller of nm-8 BalanceRun.