Zoe's Rig animated with BalanceRun 2
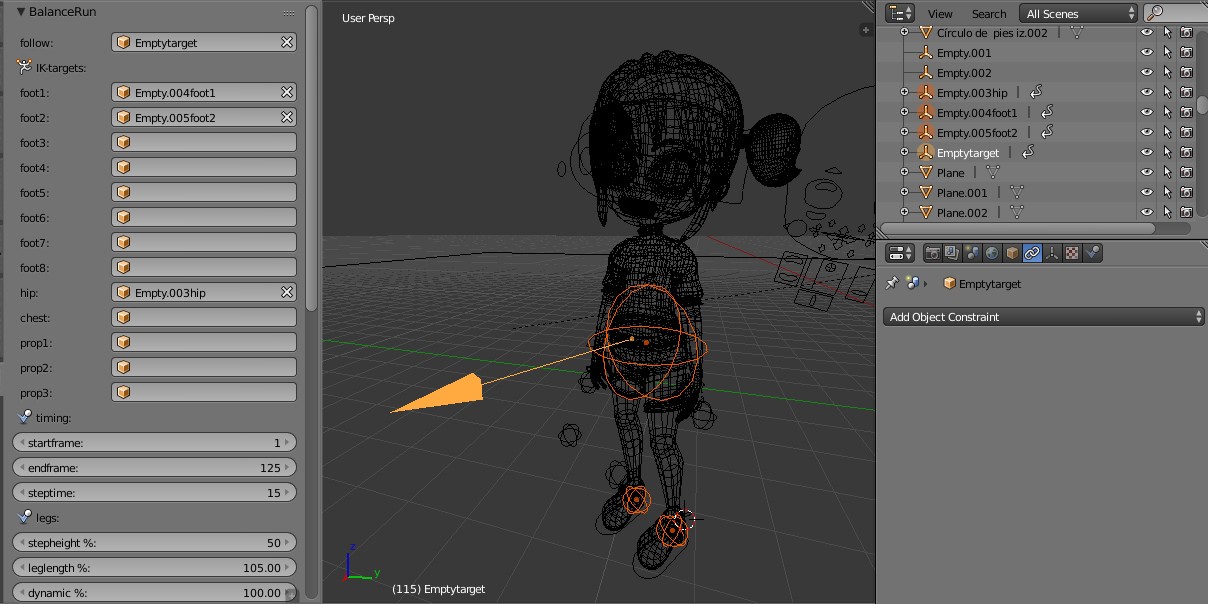
You want to animate a sophisticated rig with BalanceRun. That will need to setup some Constraints for the Bones to Empty-Objects, that BalanceRun can animate. In the Picture above you see the orange selected object: "Emptytarget", "Empty.003hip", "Empty.004foot1", "Empty.005foot2". I called them that way for this example, of course the names are up to you.
The arrow is the target object, for the character to follow. the huge sphere is the hip-helper. the small spheres are the feet helpers. these orange objects will be selected in the menu of BalanceRun, but how do they drive the characters Rig?
Now we are ready to start linking the Empties to the Rig.
the feet:
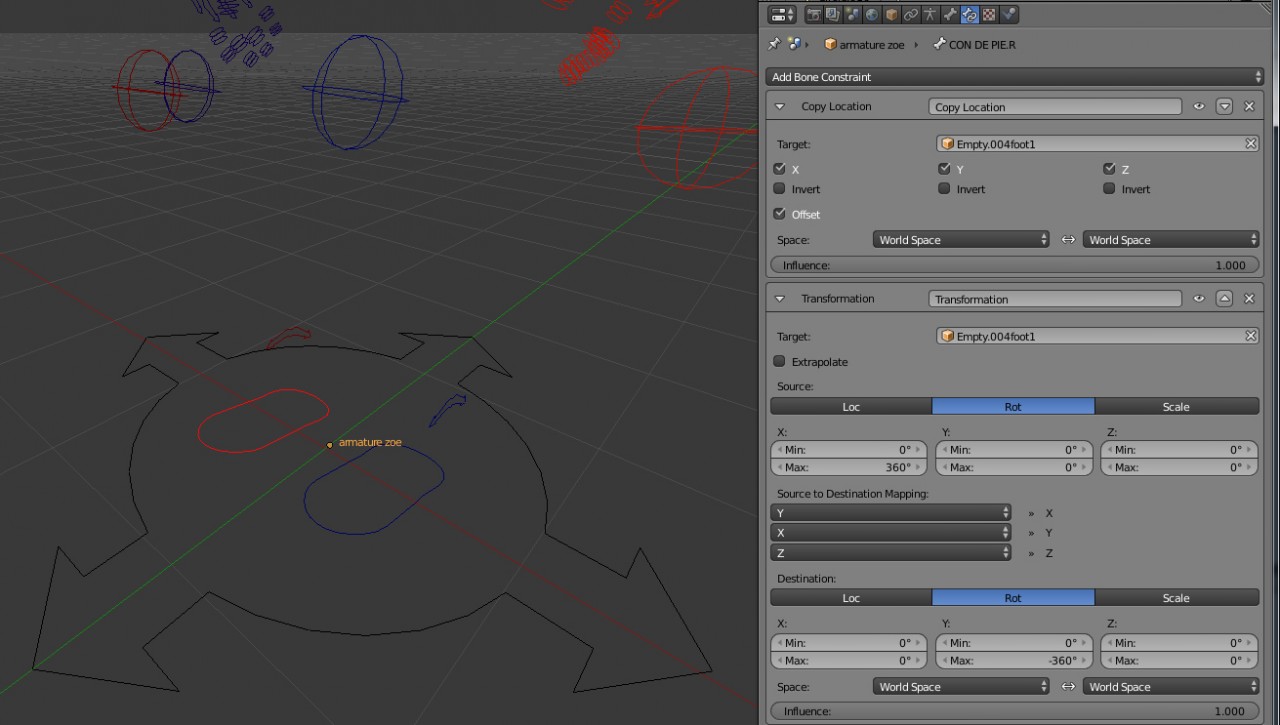
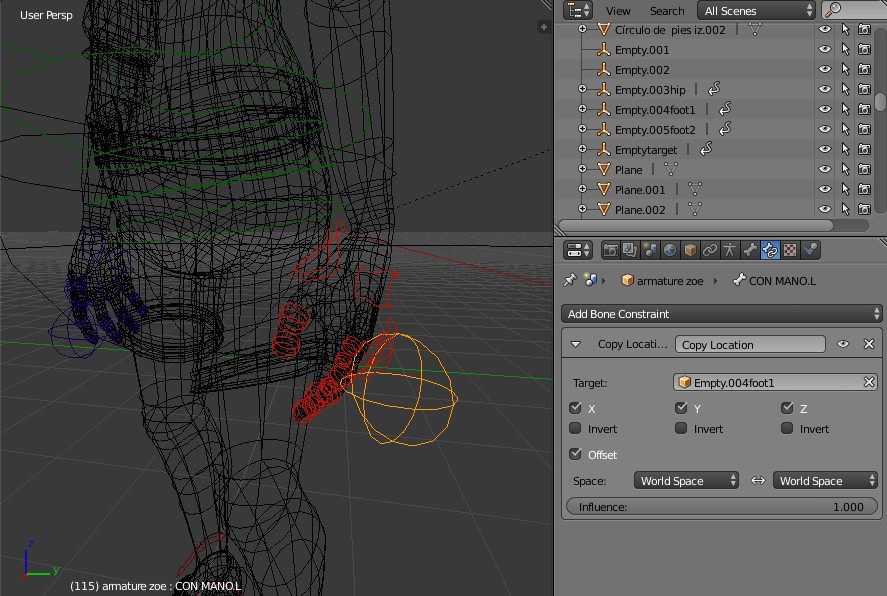
The left Foot-bone is selected in the left image. Here you see, that one has to add two Bone Constraints to the foot: a CopyLocation and a Transformation Constraint. The Transformation is usually simply a CopyRotation, but not for the Zoe Rig, since her feetbone-axis are messed up. we need to transfer the Empty-xrotation to the right Footbone y-rotation. This is done with a trannsformation-constraint as shown in the picture above.
Again this is just the case for Zoes Footbones. usually Footbones dont have flipped axis' in a customRig like that, and their rotations can be copied with a Copyrotation constraint.
Both constraints have the corresponding empty -object selected as target ("Empty.004foot1"). Note that the CopyLocation has "Offset" checked. Note also that the Transformation intervals are 0° and 360° for the targets x axis and 0° and -360° for the bones y axis.
Do the same for the other foot with the other helperobject ("Empty.005foot2") as shown below.
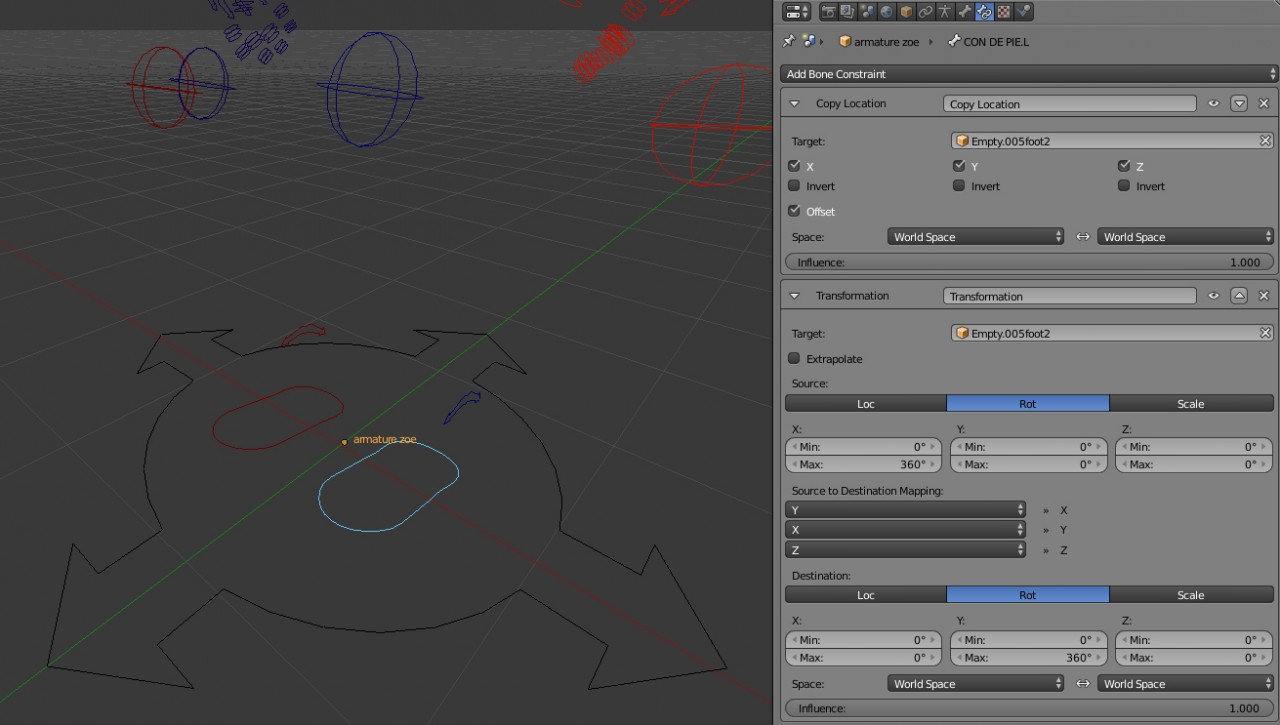
Note that the interval for the left footbone has to be 0° to +360° for the y axis. (0°, -360°).
the feet are done so far, now the hip:
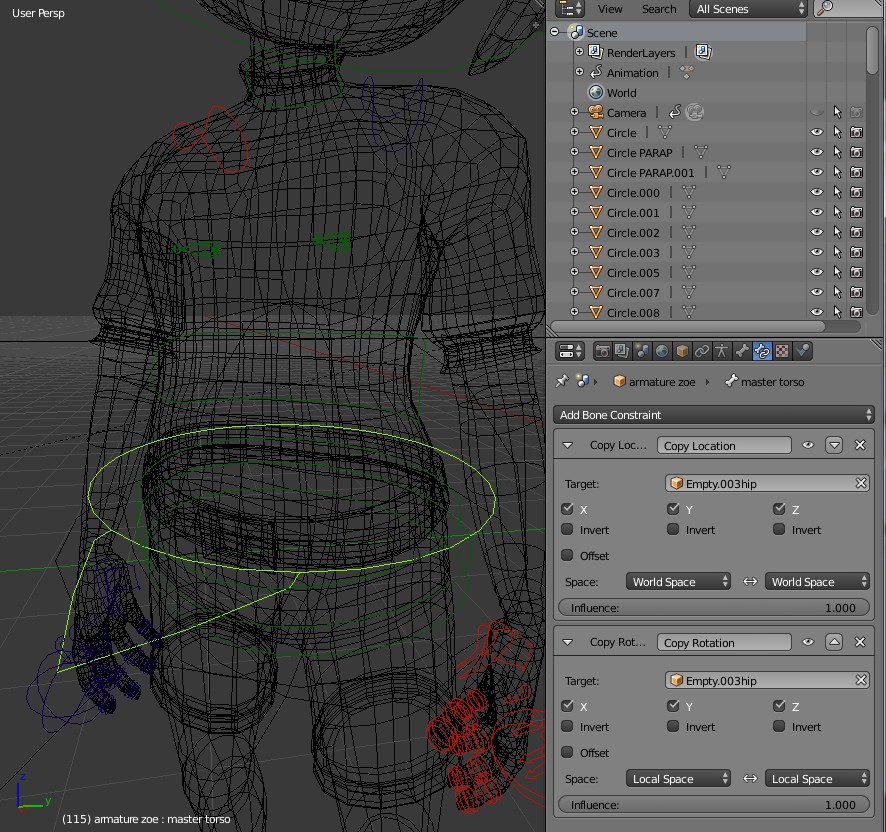
The Zoe-Rig has a circular bone called MasterTorso. Go to its BoneConstraint Tab and add two Constraints like before: a CopyLocation and CopyRotation. Again both targeting to the hip-helper: "Empty.003hip"
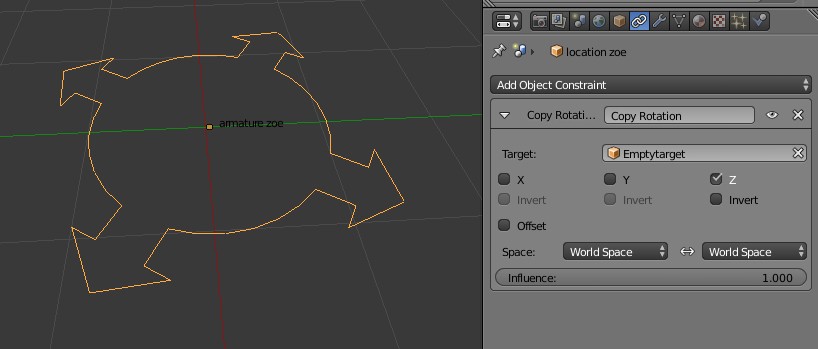
In many Rigs like this one, the Characters Rig is rotated with an AnchorObject. Here it is called "Location_Zoe" though we dont want to animate its location, we need to link its rotation to the rotation of the follow target "Emptytarget". Do that by going to the constraint-tab, and add a CopyRotation constraint, choose Emptytarget as target and uncheck X and Y-Axis, as we only want to Copy the horizontal rotation around the Z-Axis.
Mainly thats it. You could animate the Followtarget "Emptytarget" and tell Balancerun to set keyframes for the Hip and Foot empties. But Zoe's hands will try to stay in place. They need BoneConstraints also.
Select the Spheres that are located at the Armwrist of Zoe. They are the IK-targets for the arms.
I simply moved them down a bit, to stretch the arm, and added a BoneConstraint (since they are Bones again) to the other Foot-Empty that we created at the beginning "Empty.004foot1".
That way the left armwrist is linked to the right foot, and the right armwrist is linked to the left foot. I lowered the spheres, since the feet will raise while stepping, so will the spheres, as they are linked now. lowering them beneath the stretched arm, will avoid the arm to raise as well...
Now we are done with the attachment of Keyframeable Objects to a customized rig. And we are ready for Animation in BalanceRun.
Select the Empties in the BalnceRun Menu as follows:
for "follow target" choose the arrow Empty "Emptytarget"
for "foot1" choose the object "Empty.004foot1"
for "foot2" choose the object "Empty.005foot2"
for "hip" choose the object "Empty.003hip"
and choose some settings for the dynamical parameters.
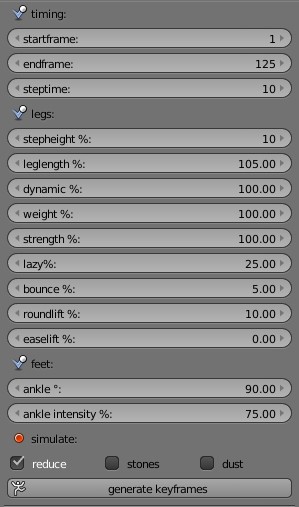 | here are two examples of settings for the character. The left one is a more stable walk, while the right one is a more dynamical setting. to avoid jumping around, i animated the "bounce" value between 5 and 50% as necessary. You will need to adjust the settings to achieve good results, and keyframe generation will take its time. be patient, grab your coffecup or work on something else while BalanceRun is calculating. Usually I have to wait for 30" per 100 Frames of animation, but this depends on the machine you are working on. | 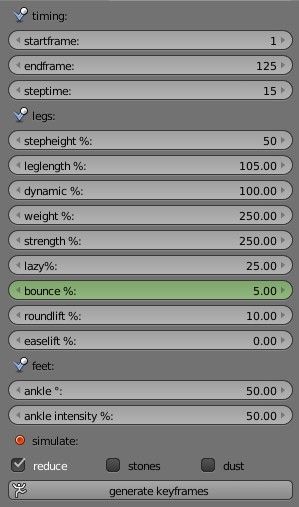 |
If you are unhappy with the result its recomended to go back using ctrl+z to the unanimated state, rather than generate keyframes over the existing ones. it should work as well, but sometimes weird results appear. To be sure you can manually delete the keyframes of the feet- and hip-empties, before you generate keyframes again.
Finally you are happy with the way the Character walks.
Be sure that you can adjust the hip and all other Helpers easily afterwards, using the DeltaTransform options in the Object-properties-tab.